Thursday, December 2, 2010

So many wet felting experiments, so little time...now what ?

 I hope all these pictures don't over whelm anyone's' computer . Do to the Holiday, I had extra time for crafting and decided to take advantage by trying some new experiments . I often see some really inspiring things on other felters blogs but have no idea of the techniques they use so I am trying to find my own way of achieving texture .
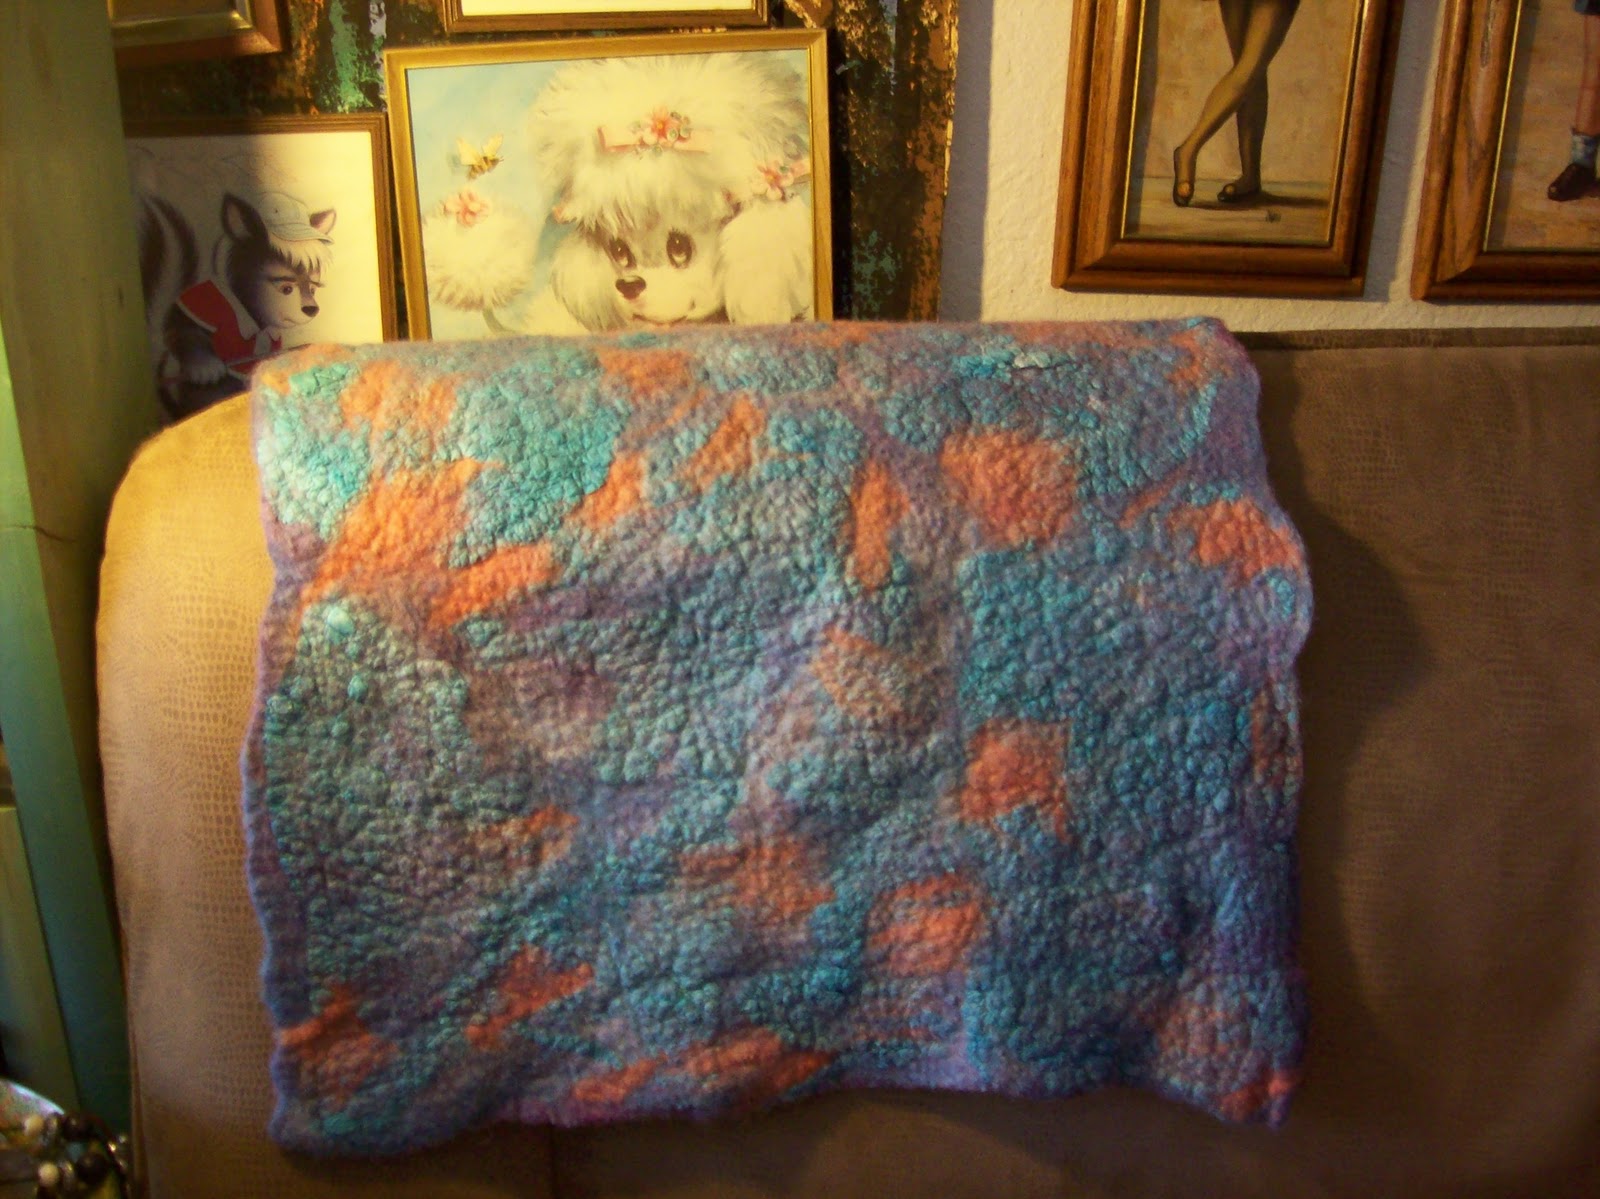
 Both the above pieces are made by layering silk bell caps, (dyed turquoise) with layers of very thin merino in salmon/orange and many shades of purple . The first picture is only one layer of merino with silk bells . I want to see how little fiber you can use and still get a durable piece of felt . The end result was about the thickness of store bought craft felt but with the extra strength and structure of the silk bells .

The second picture is a thicker layer of purples, silk bells and bits of orange merino laid over the bells . One thing I learned while doing this is that by grasping the edge of the bottom of the bell and pealing up a bit....then placing my hand inside the "bell" and pulling the top of the cap....I got a nicer result then just trying to peal from the bottom . It does take a bit of patience and lots of hand lotion to keep the silk from clinging to every microscopic skin callus .
 This is a side view to see the difference in how thick I laid down the fiber .
 Another experiment was to answer the question....can you stack wet felting and do twice as much at once ? Uhmmm, yes, but I'm not sure it is worth the trouble . This is how I did it ......

After laying down the first fibers on flat side of bubble wrap, (with bubbles against the towels ), I wet fiber with the lightly soapy water, laid down a second piece of bubble wrap , bubbles down and rubbed very lightly . I then laid on my second layer of fibers . My intention with the top layer of bubble wrap and fiber was to make a two layer "pre-felt"  . I laid down a layer of grey going one direction with tealish green in the other direction and on the second piece, I did purple on one side and blue on top of that . Using two different colors allows me to pick which color I want when I need some pre-felt . I still don't know if I felted this long enough to be called pre-felt but it held together .

I then wet downthe top layer and carefully rolled up the double thick bubble wrap fiber . This is where a very interesting ------(read frustrating), law of physics made it-self know . I understand this law but can't explain it.....(not rocket scientist) .  The part you need to know is that the inner/top layer will have extra bubble wrap sticking out and have to be readjusted as you roll to keep it from crinkling up . I just kept tugging the bubble wrap bottom to keep it flat . Sooooo......if you want to try this, just make sure that you don't lay the fiber to the very end of the bubble wrap but leave a good 9 inches bare that will then wrap around the whole thing when you start rolling it .

I rolled several time, opened the roll and readjusted and rolled some more . If you think the bottom layer needs a bit more water or realigning , just roll the top bubble wrap up by itself and set aside, wet bottom fiber and readjust as needed and then lay on the top bubble wrap again . Anyway, anyone actually read this...lol? it sort of works and did relieve my curiosity , which is the important thing for me .


 Here is the thicker three layer piece with merino+ silk bells +merino .It's thick enough to be made into a bag but still flexible enough to cut and sew into a hat or use as a scarf .
 The top and bottom pictures here are a completely different neck collar  or"mini-scarf with silk bells and red on one side and scraps of salmon chiffon well felted into merino on the other side . I don't think the red and salmon really worked together but I guess I like to make things that you can have two different colors on each side to pick which matches whatever your wearing .
 Below is the one layer of orange/salmon merino with silk bells on top....It turned out both flexible and durable which I was a bit surprised at....I thought you HAD to use two layers going opposite direction ? 
 Flexable and drapey ----(spell check says those aren't really words ? )
 The wonderful texture and shine of the silk as the wool felts and pulls it together.....I love how organic this looks ie my current obsession using silk bells .When putting the silk fibers on, just make sure that it is not to thick for the fiber to migrate though and felt down . Although the blue silk now looks solid, it started as very fine wisps of silk .

 This is both sides of the purple bottom with the silk bells on top side and salmon/orange wisps over silk .(Silk wool sandwich)
This is the back side with mostly puple and just bits of blue silk showing through .
 I think these are called "scarffetts " but have no idea how to spell that . I guess some people like that you can just stick them in your coat pocket and don't have to worry about your scarf tails dragging in the slush . This still needs a closure . It is light weight but warm with no holes for the wind to blow through like some knitted scarfs . I think this might be a bit to small though and am thinking of beading it and doubling it to make a cuff ,
 A much thicker and larger "scarffette"
 This was another "first" for me . Actually several firsts .

For one, I wanted to see what would happen using larger bubble, bubble wrap . What I wanted to do was lay down the fiber and sort of wiggle it around to expose the bubbles and create holes in the finished fabric . I've seen several felters with holes in their felt . I assumed that they were cutting the holes in when the fiber reached pre-felt stage and then continuing to felt and full piece to "heal" the cut edges . I just wanted to see if I could get a similar effect using a different method....(spoiler alert....Mine didn't look anything like theirs) . I did make some holes though, so some success . Some of them I filled with the orange alpaca "seconds" and some I left open . I really like the end effect though but rolling large bubble wrap really is frustrating and awkward . I think it was worth the trouble but be prepared to keep opening your roll and adjusting your fabric so it doesn't clump up unless that is an effect your going for .
The other firsts with this project was using some really lumpy fiber which I bought as "batts" but turned out to be little slugs....(the bits of fiber that you get from coming fiber and is usually used for stuffing .  Well, it does felt but it's impossible to really get an even layer for a nice scarf but works in this more abstract table topper .
Above are some of the "pre-felt" that I made for the felt fabric below . I cut out simple geometric shapes and placed them on top of 2 thin layers of merino . At first wetting and rolling I was afraid that they were not felting but adding lots of water and lots of rolling, they began merging and I really like the effect . I think this is my favorite felt for the week as it reminds me little organisms swimming in the sea . Perhaps the beginning of life on earth .

Below is the back side....darker and with no pre-felt but lots of organic shapes from the tye-dyed wool fiber.
I still don't know what i will end up doing with this but it's certainly large enough to sew up several computer bags or just be huge table topper ?
Below is just another bit of merino+silk bells scarf or I may cut it up to make dolls cloths .
This is about 3 thicker layers that I wanted to use to make a sewn hat with some fake fur...sewing?

I'm not sure what to make of this piece . It was dark wool before I dyed it and something close to Shetland, so not soft enough for a scarf...in my opinion . I hated it at first but it's growing on me and I think I might find something interesting to do with it .
Below is my first time working with kid mohair which feels almost as soft as alpaca but has a much tighter crimp . I think it makes the perfect embellishment for this needle felt wrist cuff....(then again, I'm kind of weird ).

Below are my needle felting for the week....nothing but buttons . I had several people ask me for buttons a the Shepherds Harvest festival last spring so I thought I should make some . If I ever open my Etsy store....(I mean, when), I will offer these as a craft supply . They are mostly free form, flat on one side and domed on top . I plan on sewing on a small metal ring to attach to bag or garments . A few are started by using a tiny cookie cutter form and then free needle felting a bit more shape to the petals . Anyway, they take 20min and are a fun and mindless project while watching TV .
I played around using different fiber...mohair, silk, merino...different style (my favorite is the free form one of course ) .
Below is the new addition to my craft pile....some much needed cotton thread for helping me turn my stash of wet felt fabric into bags, hats, cuffs, etc . Look for some sewing felt projects in the next few weeks and have fun with your own experimenting !

Monday, November 22, 2010

Needle felt bear and trick for cleaning wool

Well, this is the latest addition to my felted furry family posing in front of some washed wool that will likely go into making more fuzzy friends . I will try and get a more scenic picture of him if the sun ever returns to MN .
.....and.....TaaDaa....this is my genius invention for washing wool when you don't have a washing machine to scour it . Submerged in the tub is about 3 pds of some Icelandic wool I bought in Hopkins a few weeks ago . It had very little VM but was very odoriferous . Icelandic has less lanolin then many other wools so I thought I would give washing it a try .

I began by cleaning the bathtub and then filled it with the hottest water we have...to hot for hands I but didn't bother with a thermometer so not sure of actual temp .

I added some Dharma Synthropol and a little Original Dawn and mixed this about .

I them upended my wool bag onto some plastic screening that I bought at a garage sale....it's the kind that you would use for a screen door . Pores are large enough to let water through but small enough to keep the wool bits out of our drain . The size was about two feet larger then the top of the tub when it was submerged and I was lucky that it happened to be pre-cut to that size .

I then gathered the wool filled screen  like a ruck sack and slowly submerged it in the water . Having it compacted into the ruck sack shape helps keep it from agitating to much .

I held the sides of the plastic screening onto the top of the tub ledges with some shampoo bottles but magnets would also work well .

I let the whole thing simmer in tub for 30 min and then gatherd into ruck sack shape again and pressed the water out and while compacted (to avoid felting fibers before I'm ready to), rinsed it with my hand help shower head . I then refilled the tub with fresh water and soap . I did this 3X but basically you just want your last water to be clear and not brown .

After I thought it was clean enough, I again ruck sacked it= gathering in all edges, and rinsed with the hand held shower head and when finished squeezed out as much water as I could . I placed the bundle on a piece of fire place screen that I used as a display at a craft show but I really need to go to the garage and get out the other 2 sections so I can spread the wool out a bit more for drying . It's about 30 degrees out side right now, so that's not an option but I am considering putting a bit in the oven to see what happens and using a blow drier to experiment with drying it faster....mouldy wool does not sound pleasant .  Wish me luck .

Anyway, I wouldn't want to be doing this for a living but it is "doable" and modern technology....(running water, shower heads, plastic screening) make it bearable when you can't afford the fancy prewashed wool . I have to say it is much easier then trying to wash a cat.....(no claws) .

Posted by Picasa

GameStop Rocks Christmas contest


Mama’s Holiday Wish List Meme

TodaysMama (link to: http://bit.ly/tmwishlist) and GameStop (link to: http://bit.ly/gamestop10) are giving away a sleighful of gifts this holiday season and to enter I’m sharing this meme with you.

1. What is your holiday wish for your family?


 My Holiday wish is that I could spend it with my BF's family as it has been to many years since we have seen them and they are such wonderful people .

2. What is your Christmas morning tradition?

It seems like I always end up working Christmas Eve over night so the morning tends to be coming home and giving cats a special breakfast and going to sleep . 
3. If you could ask Santa for one, completely decadent wish for yourself, what would it be? 

I suppose my own Polar Bear is out of the question....so next would be a horse or someone who would come to my apartment and help me clean and organize .
 
4. How do you make the holidays special without spending any money?

Having my favorite people and animals around doesn't cost a dime and that IS what makes the Holidays special ....that and my mom's cookies . 
 
5. What games did you play with your family growing up?

Lots of card games and more recently dominoes....(.I grew up in a pre-Gamestop world .)
 
6. What holiday tradition have you carried on from your own childhood?

I don't recall to many traditions other then eating decadent food with less guilt .  
 
7. Where would you go for a Christmas-away-from-home trip?

Either Kansas or Florida to be with family .
8. Check out GameStop (link to: http://bit.ly/gamestop10) and tell us, what are the three top items on your GameStop Wish List this year? 


Well, I tried to get some cool pictures from GameStop but am not tech savoy enough to cut and past the images so.....uhhm .

I would love a Wii with the Yoga mat and sports board because we are in some serious need of exercise here and I would like to get Flicker here .

The Kenect looks really awesome and would also help shed some Holiday pounds .

I would love some learning and gaming software for my computer .

Well, I think that's it, I've never won a contest before but couldn't pass this one up so go check out the links listed and enter on your own blog .

Thursday, November 18, 2010

Needle Sculpting with Mohair and Merino blend

I needle felted a few more friends this week . Despite my resolution to not make more as I have run out of room to display them in my own apartment and have still not managed to set up my Etsy shop , I could not resist the urge to needle felt .

This is one step closer to setting up an Etsy shop however, as I am "practicing" taking pictures using my wet felt wool table runner and a print of one of my favorite paintings .
I'm not sure if it's to distracting to others, but I really like the surreal look of it .

Taking pictures also helped me see that I am a bit out of practice needle sculpting . I need to add bigger eye lids and more pink roving to the mouth area of the large mohair animal . It looked fine in "person" but looks washed out in the picture and the eyes are a bit spookier then I had intended .

well ....I am losing the light but thought I would go ahead and post the "after" picture . I added a bit of pink to the inner ear and snout and eye lids and think they help , though he actually looks pretty upset about something . If there a market for smirking, disgruntled or angry animals , I think I have it covered .

Also forgot to mention how much I like using the mohair for the "loose hair bits " . The individual hairs stand out much better then when I have tried this with my usual merino .


I really am going to try and organize my crafts and begin posting my felt on Etsy this week . It would be nice to make a few sales before Christmas....then again, I've been saying that since last year so the operative word here is "try" .
Posted by Picasa

Tuesday, November 16, 2010

needle felt jewelry ...and cat peace

 Finally took some of the hundreds of needle felted "beads" I make when I'm to tired to sculpt and animal and added them to the sculpted wool amulets and mixed them with some semi-precious stones, glass and pearls to make these necklaces . Obviously, not for the faint of heart , no dainty chains and butterflies here just bold colors, textures and shapes . Large but amazingly light weight...one of the advantages of wool .

I wasn't exactly sure how I would bead these but s large sewing needle and regular Beadalon worked fine . The only draw back is that I had to constantly take the needle off, thread the beading wire through the bead then rethread and sew through the wool bead...repeat x 100 . I like the contrast though so it was worth the effort for me .

Wet felt fabric to sew into....? probably bags but I might make a few cuffs and pins as well .
 Up-date on Balhoo and Max....best buddies in less then a week . I think Balhoo was starved for another  boy to chase and wrestle with and Max has much the same desire...win/win .
 Both recovering from a bout of "chase and wrestle "
 Balhoo says that Max tastes delicious !

Hope your all enjoying felting along with preparing for winter Holidays .

Tuesday, November 9, 2010

Needle felt jewelry from peapod brooches to "knot braclets"

I haven't done much felting this past week as it has been filled with cat wrangling . The below pieces are made using a slightly new method that some might be interested in, though I warn that it does take some patience .

I started with a piece of roving about 3X the length of your wrist and then knotted along it's length . The knots should be firm but not hard as you don't want to brake your needle . I then just firmed the fiber from one end to the next leaving a few inches of fiber at each end to connect the piece into a circle .

I made a smaller knotted roving to make the red "peas" and then lightly felted (prefelted) some green roving and felted it over the red knotted peas .

The larger braid is the beginning of either a pet collar or a choker but I just not sure what to do to finish it off  The two smaller circle pins will be decorated with a few beads and a pin back and used to decorate a purse or scarf .
Needle felt jewelry


Posted by Picasa

Sunday, November 7, 2010

Welcome Max the cat

Welcome our new family member Max....Mitch, my SO, says he is the cat version of a Great Pyrenees dog which I would love to get if I ever had the space for a dog...not likely this life time but one can always dream . In the mean time....this guy will do . We got him "accidentally" after a quick visit to Human Society . (I just went to look !)
He's almost 13 pounds of muscle and fluff....lots and lots of fluff that I have already started collecting to felt myself a scarf . Thankfully, he loves to be brushed as much as cuddled . The only draw back so far.....is his housemate Balhoo , our black fluff ball, is not really sure that he needs such a big "little brother" . Balhoo had really enjoyed several years of hunting and pouncing on his big sister Wolf ,  a 17 year old  cat 1/3 his weight . A bit like matching your grandma with The Rock in a cage match . He's not so fond of the odds now but thankfully Max is a gentle giant and not really interested in proving his dominance .

Below, Balhoo takes a quick sniff of the interloper . I think that's pretty good progress in relations for 24 hours....look how long it's taken to try and find peace in the Middle East .
Posted by Picasa

Monday, November 1, 2010

wet felt scarf with silk gauze on bottom and merino accented with silk bell caps

I wish I could figure out a better way to photo large head scarves . As the title suggests...these are a layer of wool between silk gauze on the bottom and silk bells on top....silk and wool sandwich . The top picture  is showing the turquoise silk bells spread over the blue and peach merino . The silk base is sort of a deep pink .
The above picture is the back side, the wool colors are showing through the peach silk gauze . I found it interesting how the blue wool on the reverse side looks purple when seen through the peach silk scarf base .
I am really enthralled with the texture created by the thin wisps of the silk bell as the wool shrinks up with felting . It looks bumpy but they are silk "bumps" and really soft . I think this would be a beautiful head scarf or shoulder shawl on a sleeveless black dress . As you can see, I'm still not quit ready for winter colors .
Posted by Picasa

LinkWithin

Related Posts with Thumbnails