I hope all these pictures don't over whelm anyone's' computer . Do to the Holiday, I had extra time for crafting and decided to take advantage by trying some new experiments . I often see some really inspiring things on other felters blogs but have no idea of the techniques they use so I am trying to find my own way of achieving texture .
Both the above pieces are made by layering silk bell caps, (dyed turquoise) with layers of very thin merino in salmon/orange and many shades of purple . The first picture is only one layer of merino with silk bells . I want to see how little fiber you can use and still get a durable piece of felt . The end result was about the thickness of store bought craft felt but with the extra strength and structure of the silk bells .
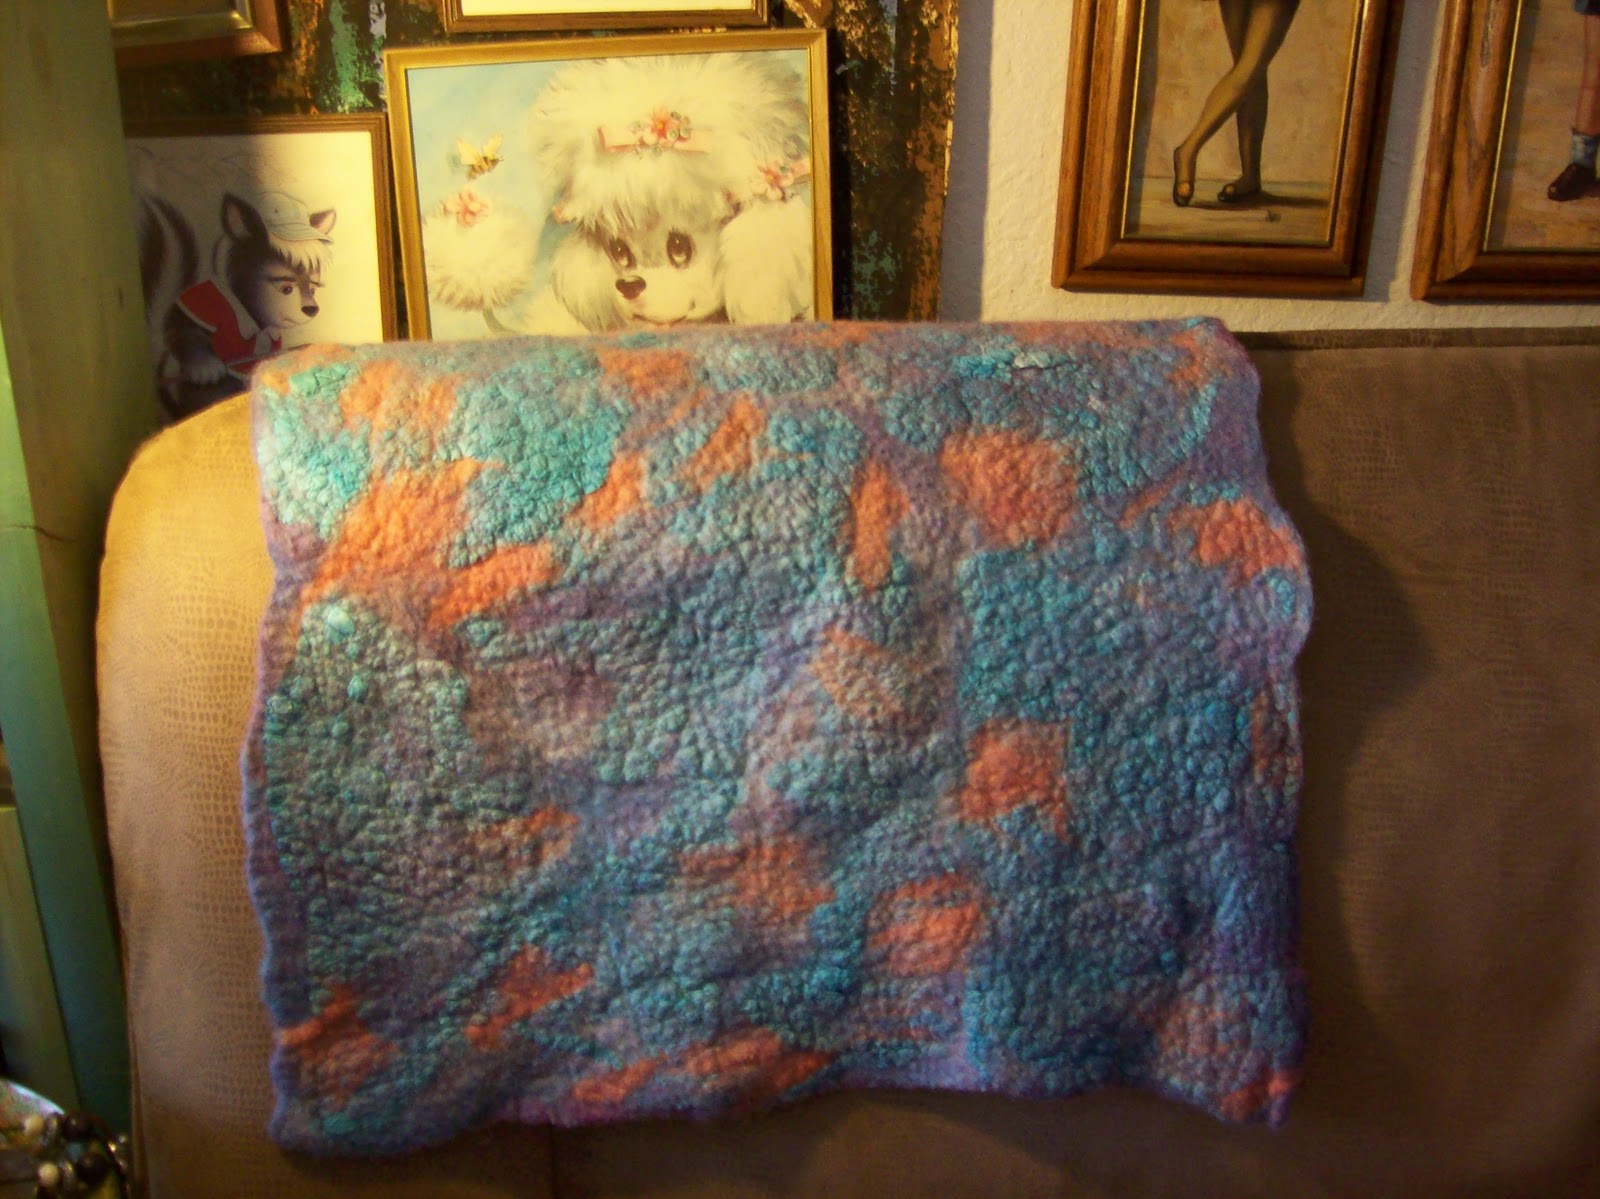
The second picture is a thicker layer of purples, silk bells and bits of orange merino laid over the bells . One thing I learned while doing this is that by grasping the edge of the bottom of the bell and pealing up a bit....then placing my hand inside the "bell" and pulling the top of the cap....I got a nicer result then just trying to peal from the bottom . It does take a bit of patience and lots of hand lotion to keep the silk from clinging to every microscopic skin callus .
This is a side view to see the difference in how thick I laid down the fiber .
Another experiment was to answer the question....can you stack wet felting and do twice as much at once ? Uhmmm, yes, but I'm not sure it is worth the trouble . This is how I did it ......
After laying down the first fibers on flat side of bubble wrap, (with bubbles against the towels ), I wet fiber with the lightly soapy water, laid down a second piece of bubble wrap , bubbles down and rubbed very lightly . I then laid on my second layer of fibers . My intention with the top layer of bubble wrap and fiber was to make a two layer "pre-felt" . I laid down a layer of grey going one direction with tealish green in the other direction and on the second piece, I did purple on one side and blue on top of that . Using two different colors allows me to pick which color I want when I need some pre-felt . I still don't know if I felted this long enough to be called pre-felt but it held together .
I then wet downthe top layer and carefully rolled up the double thick bubble wrap fiber . This is where a very interesting ------(read frustrating), law of physics made it-self know . I understand this law but can't explain it.....(not rocket scientist) . The part you need to know is that the inner/top layer will have extra bubble wrap sticking out and have to be readjusted as you roll to keep it from crinkling up . I just kept tugging the bubble wrap bottom to keep it flat . Sooooo......if you want to try this, just make sure that you don't lay the fiber to the very end of the bubble wrap but leave a good 9 inches bare that will then wrap around the whole thing when you start rolling it .
I rolled several time, opened the roll and readjusted and rolled some more . If you think the bottom layer needs a bit more water or realigning , just roll the top bubble wrap up by itself and set aside, wet bottom fiber and readjust as needed and then lay on the top bubble wrap again . Anyway, anyone actually read this...lol? it sort of works and did relieve my curiosity , which is the important thing for me .
Here is the thicker three layer piece with merino+ silk bells +merino .It's thick enough to be made into a bag but still flexible enough to cut and sew into a hat or use as a scarf .
The top and bottom pictures here are a completely different neck collar or"mini-scarf with silk bells and red on one side and scraps of salmon chiffon well felted into merino on the other side . I don't think the red and salmon really worked together but I guess I like to make things that you can have two different colors on each side to pick which matches whatever your wearing .
Below is the one layer of orange/salmon merino with silk bells on top....It turned out both flexible and durable which I was a bit surprised at....I thought you HAD to use two layers going opposite direction ?
Flexable and drapey ----(spell check says those aren't really words ? )
The wonderful texture and shine of the silk as the wool felts and pulls it together.....I love how organic this looks ie my current obsession using silk bells .When putting the silk fibers on, just make sure that it is not to thick for the fiber to migrate though and felt down . Although the blue silk now looks solid, it started as very fine wisps of silk .
This is both sides of the purple bottom with the silk bells on top side and salmon/orange wisps over silk .(Silk wool sandwich)
This is the back side with mostly puple and just bits of blue silk showing through .
I think these are called "scarffetts " but have no idea how to spell that . I guess some people like that you can just stick them in your coat pocket and don't have to worry about your scarf tails dragging in the slush . This still needs a closure . It is light weight but warm with no holes for the wind to blow through like some knitted scarfs . I think this might be a bit to small though and am thinking of beading it and doubling it to make a cuff ,
A much thicker and larger "scarffette"
This was another "first" for me . Actually several firsts .
For one, I wanted to see what would happen using larger bubble, bubble wrap . What I wanted to do was lay down the fiber and sort of wiggle it around to expose the bubbles and create holes in the finished fabric . I've seen several felters with holes in their felt . I assumed that they were cutting the holes in when the fiber reached pre-felt stage and then continuing to felt and full piece to "heal" the cut edges . I just wanted to see if I could get a similar effect using a different method....(spoiler alert....Mine didn't look anything like theirs) . I did make some holes though, so some success . Some of them I filled with the orange alpaca "seconds" and some I left open . I really like the end effect though but rolling large bubble wrap really is frustrating and awkward . I think it was worth the trouble but be prepared to keep opening your roll and adjusting your fabric so it doesn't clump up unless that is an effect your going for .

The other firsts with this project was using some really lumpy fiber which I bought as "batts" but turned out to be little slugs....(the bits of fiber that you get from coming fiber and is usually used for stuffing . Well, it does felt but it's impossible to really get an even layer for a nice scarf but works in this more abstract table topper .
Above are some of the "pre-felt" that I made for the felt fabric below . I cut out simple geometric shapes and placed them on top of 2 thin layers of merino . At first wetting and rolling I was afraid that they were not felting but adding lots of water and lots of rolling, they began merging and I really like the effect . I think this is my favorite felt for the week as it reminds me little organisms swimming in the sea . Perhaps the beginning of life on earth .
Below is the back side....darker and with no pre-felt but lots of organic shapes from the tye-dyed wool fiber.
I still don't know what i will end up doing with this but it's certainly large enough to sew up several computer bags or just be huge table topper ?
Below is just another bit of merino+silk bells scarf or I may cut it up to make dolls cloths .
This is about 3 thicker layers that I wanted to use to make a sewn hat with some fake fur...sewing?
I'm not sure what to make of this piece . It was dark wool before I dyed it and something close to Shetland, so not soft enough for a scarf...in my opinion . I hated it at first but it's growing on me and I think I might find something interesting to do with it .
Below is my first time working with kid mohair which feels almost as soft as alpaca but has a much tighter crimp . I think it makes the perfect embellishment for this needle felt wrist cuff....(then again, I'm kind of weird ).
Below are my needle felting for the week....nothing but buttons . I had several people ask me for buttons a the Shepherds Harvest festival last spring so I thought I should make some . If I ever open my Etsy store....(I mean, when), I will offer these as a craft supply . They are mostly free form, flat on one side and domed on top . I plan on sewing on a small metal ring to attach to bag or garments . A few are started by using a tiny cookie cutter form and then free needle felting a bit more shape to the petals . Anyway, they take 20min and are a fun and mindless project while watching TV .
I played around using different fiber...mohair, silk, merino...different style (my favorite is the free form one of course ) .
Below is the new addition to my craft pile....some much needed cotton thread for helping me turn my stash of wet felt fabric into bags, hats, cuffs, etc . Look for some sewing felt projects in the next few weeks and have fun with your own experimenting !


Mice to view your blog and the details of felting. I also like to try doing some experiments. In the process learning. Thanks for sharing.
ReplyDelete