Saturday, June 18, 2011

Week in Review and dragon wings phase 2

So, these wings are my second attempt at the dragon wings and I am much happier with the result . Firstly, I am in love with the fabric which I did not make myself but take full credit for having good taste to buy . I've been saving it for something special and I think this qualifies . Sorry for the poor pictures...another cloudy day in MN but if you click on the picture you can get a better idea of the detail .

The silk chiffon fabric that I use on phase one wings sagged under the weight of the glitter modge podge but I use a different method to make these cotton wings which I will show in my next blog post . The reverse side, murky as the shot is, shows how I eventually solved the problem of having removable wings . I will also show how I did this next post as it was one of my biggest challenges . These can easily be removed for shipping and even easier replaced by the buyer .

Another goal for this week was over coming my fear..(though not my annoyance), with using wires in my felting . One reason I needed to do this was to add claws to my animals .  I thought these proto-type "paws with claws" would make interesting necklaces with a stone glued to their centers . But mostly, I just wanted to practice wiring the toes with enough wire hanging out that I could add Femo claws to my smaller animals . I didn't happen to have any Femo....(in the mail) so I used several layers of white enamel with mixed results .
There is even a human mummy hand in the mix : )
I wrapped several layers of silicon tape....(traditionally used to wrap pipe threads to prevent leaking when joining to pipes together . )  ...around the wire hand and then painted it in flesh tones, then wrapped some more around the hand to imitate mummy bandages . The largest paw does not have wires but is another cat toy with needle felted silk as claws . Silk needle felted better then I would have though, had I not tried it .


Moving on from the toes, I wired toes and legs on the above guy so I could make bent legs . The claws are wire wrapped and needle felted in silk but I hope to do the next nails with the femo . The base of most of the animal is wool which I covered with some yummy alpaca in reddish brown and the white "fur" is my current favorite...corn silk . It's just so soft and shinny and doesn't matt up like the merino .

One last project was just a make-over from a few year ago....


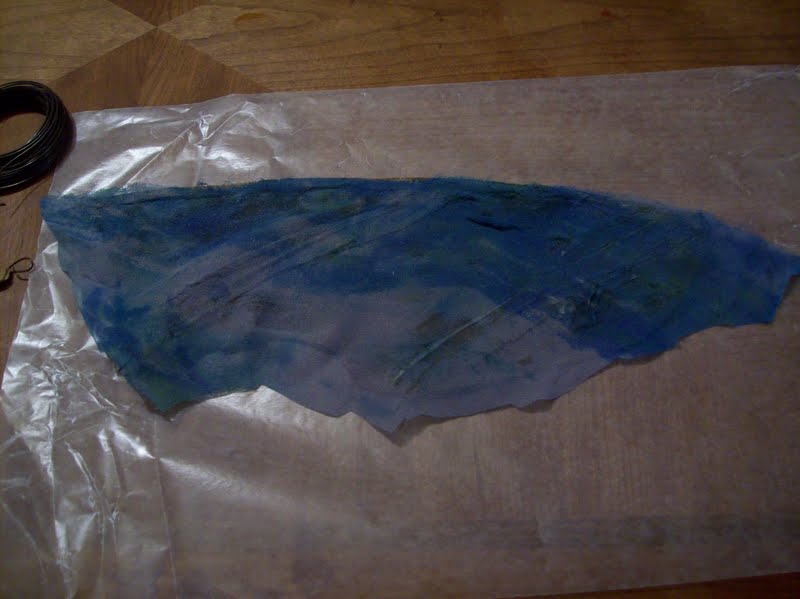
The center swirl is merino but the top and bottoms are pure silk needle felted into the wool base fabric . Can't really see the shine in this low lighting but it's supper soft and shinny . Not sure what I will do with it but it was interesting to felt with the silk fibers and I'm happy with the results . So that's was my week and I feel like I learned a lot and am pretty happy with my experiments . Wing tutorial to follow and hopefully one about felting with wires if I get any better at it .

Happy felting


Monday, June 13, 2011

Dragon wing experiments .....phase one

 These dragons are definitely out of my comfort zone . I had no idea how to make the wings and spent a day just looking at google pictures of different kinds of wings . It seems that most dragons are given ether bat like wings or pterodactyl wings .

For the smaller dragon , (which I started with needle felt wings), I decided to try leather bat like wings . I thought the larger dragons narrow wet felt body and needle felted scaled tummy looked very insectoid so I thought I would do more of a dragonfly wing .
 Above and below are the small dragon wings using some of the scrap leather I collect . I didn't do a rather sloppy job of cutting the leather strips that are covering the top edge and two projecting "spines" because I planned on covering that side with some fabric which ended up being a mistake as the fabric I chose was to thin . I kept the wire in place using some very strong double sided tape I picked up at Axman<---love that place for craft supplies . I left a bit of wire projecting out the edge of the wing and wrapped it with another AXman purchase called...."thread tape" . It's very thin, not sticky and bright white so I thought it would make a good claw . (If you've never heard of it, it's the stuff you wrap around pipe threads when you connect them to prevent leaks . )
 The above  (before trimming ), is the dyed chiffon that I adhered with and  coated with "glimmer modge podge" to the wired side of the wing .
 Above and below are the dragon fly wings . I began by cutting out a form to wrap the wire around so I could make sure and have the same basic shape and size....that is something that I don't do well just by "eying" it . On a side note....the material I used to make my form also works great for needle felting and you can get a huge piece for around $15 at your local home building store . It works much better then the cheap packing foam and is cheaper and less messy then pillow foam mats . Downside is that it's noisier .
My basic process needs a lot of work and a trip to the craft store . I want something that I can attach to the wire frame that is transparent AND that I can draw/paint the wing veins but it must be durable and shippable . The durable part is really important as is finding the best method to attach the wings to the dragon so they can easily be removed for shipping . Problems like this are what I thrive on so I have some fun to look forward to .

I also decide that I have to overcome my trepidation of using wire in my animals . I'm starting by using wire to make feet but more of that later .

Happy felting .

Saturday, June 11, 2011

Dragon finally finished

The second dragon is finally finished...maybe . I did experiment with some new wings last night that I might try as I'm not totally satisfied with the needle felt wings .They do "go" with the over all cartoon look and they are super soft merino and silk but they aren't very dragony . The feet are wired so I could curl the toes . I hate needle felting with wires....took 6 hours because I had to work slow enough not to break my needles on the wire  .


The body is covered in a layer of alpaca and silk in purple, green and blue but I can't seem to take a picture capturing the shine . Not much to blog when each animal is taking me a week to finish .


Happy felting .

Monday, June 6, 2011

polar bears, corn fiber and WIP dragons

Please click on the pictures for more detail because I spent a lot of time on detail for this mom and teen polar bear set . Most of last week was building the base of wool and needle felting the claws and paws .

The feeling I hoped to create was of the innocent bear cub getting ready to walk off to explore and mom's protective arm holding him back as well as the raised arm issuing a warning to anyone considering messing with her cub .


I'm not a natural sculptor so getting proportions and body positioning right is hard work for me but I really wanted to try a more cerebral challenge  . I'm hoping to get up the courage to enter this into our local state fair but deadline is approaching and I'm not sure if I will over come my trepidation in time....or that this will fit into one of their crafting categories .


Above are a few more detailed shots but even with the photo lights I used, it is hard to see the texture of these bears and I have a little secret to share about that........corn fiber .

Yep, unknown to me, the stuff not only felts well into the wool base but is softer, shinier and less "matting" then the traditional merino I have used in the past . I tried a blend of alpaca and mohair first and didn't like the end result which was to "hairy" , so I gave the Ingeo=corn fiber, a shot and it worked a "treat",( as the Brits say ) . I'm now so enamored that I ordered another 8 Ozs to play with and hope to get it this week . I loved how pure white this fiber was and was pleasantly surprised that it not only felted into the core fiber to make nice hair but you can also use it to felt alone, though it does take longer to felt then wool,  I think it worked great for nails, teeth and horns .

 Above is my only other finished felted friend from last week . I don't know "what" he is but I think he's cute and less scary then most of my animals .

Following are dragon "bits" from my current week long project ...hopefully I will have to time to finish and post more details about my process before Wednesday when I return to my paying job .


This begins with the dragon head using corn fiber for the teeth and horns . Then I decided I wanted to try and use some of my wet felted material for the body but made it to large for the head so these will be two different dragons .

side note...(One of the reasons that I began learning nuno and wet felting was to make my own "fabric" to sew animals , use for making their clothing and as mats for them to sit on . However, I found the whole wet felting so fun I got a little carried away and it became it's own obsession . Now, I am trying to get back to why I'm wet felting and the dragon was my first in that goal . )

I didn't take pictures of each step but will try and blog about the details of the dragons once they are finished .

In the mean time....happy felting to all .

LinkWithin

Related Posts with Thumbnails