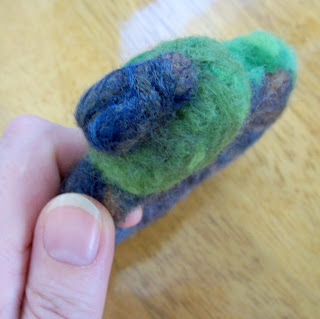


3 hours each, for such a small project seems a bit
extravagant but I am hoping that others will enjoy the way they feel...fluffy jewelry for summer ? Well, perhaps they will not sell at Shepherd's Harvest unless the temp is below 50...(which is possible), but I was thinking they "might" actually work for summer....they are light weight and wool is supposed to be a great absorber of moisture, (for those who do actually perspire) . The next logical step is...wool sweat bands for those who want to keep the
perspiration out of their eyes while working out . Will it work or be to hot ? I think I will have to be my own
guinea pig on this, which is a great motivator for me to work up a sweat with a bit of
exercise....
(Exercise ??? Yeah, I'm sure I will do that... right after I finish cleaning the house . )
As to technique for "slip
ons".....
All of the "slip
ons" are
Merino wool fiber cut about 3 inches larger then my wrist. You can also use some alpaca in different shades of brown and create a wood grain effect . (I plan on doing this later this week .)
I then attach one end of the fiber to a cross piece of fiber to secure it and you can either twist or braid the fiber to
create a *firmer starting piece and begin needle felting up and down the fiber until it becomes firm .( The length shrinks as it's being felted, so I end up with a bracelet that fits around the wrist with about 1/2 inch of room . )
Once all but the last inch is firmly felted, I attach the last 1/2 inch to the
beginning part of bracelet and wrap the cross fiber around both ends to create a circle and felt very firmly, so it will not come apart when slipped on..(.really important step .) I then spend another hour just felting any loose fiber ends until all is smooth and very firm and this is when you can add whatever design you want to the base...stripes of color, flower or other patterns can be added and I will experiment with this in future bracelets .
* one of the most helpful things when needle felting is the tighter you can make the fiber before you start felting, the faster the felting will go .
Technique for needle felted cuffs ....
The first one I tried, I used a bit of
non-pilling fleece cut a few inches larger then I needed . I'm not recommending fleece, as I think it takes longer to felt then using wool base, but it is an
optionif it is all you have around . (The second cuff, I used a piece of thin prewet-felted sweater and about twice as much fiber and it felted a little faster . )
I then took an even larger bit of merino and felted one side. This will be the side that goes against the wrist, so you can pick your less interesting fiber for this but it needs to match the fiber colors you are using on the front because the other side will have the lose ends of fiber poking through as the fiber felts .
Flip the piece over and and chose the colors you would like to be on the side that shows . Lay the fibers onto the piece with a few inches sticking over the edges and both ends, these will be
wrapped around the core piece of fabric and tucked in and felted . Obviously, the more fiber you use, the thicker the cuff will be but don't get skimpy unless you want the core fabric to show through...(made this mistake a few times on my felted pins . ) after the front is
firmly felted, you can add any design you fancy or leave it abstract and accent it with some beading .
Once the front, sides and ends are firmly felted, you will have a very fuzzy back which you can leave or trim a bit .
To make it "wearable", you can either sew on a clasp or a vintage button on one side and colorful elastic hair band on the other side .
 Look who wants a hug !
 Grin Lynn..hanging out in his natural habitat .


