The above critters are a blend of fibers with wool needle felted sculpture an added thick layer of alpaca, llama and mohair felted into base and then reverse felted . It takes almost as long to do the reverse felting as it does to shape the base sculpture , about 50-60 hours total for each animal . Below is the guy I worked on all last week and I did add the leather lids with mohair lashes but I still need to find a better way to do them . The hardest part is getting the lashes to curl up . I ended up using hairspray but that leaves them spikier then I would like .
One of the things I have always wanted to mention about working with animal fibers is that it actually has "memory" . You can see on the new animal below that one ear is open and one is curled . Although they are not wired, you can actually do some basic repositioning and they will stay that way until you reposition them .
Below, I am holding the arm up and when I let go, you can see that it retains some of that movement and then you can simply return it to original position . Although the animals are very firmly felted, they still have some natural movement if you want to move their arms, head or legs . I just think that is pretty cool .
Now I just need to get a green screen so I can do some stop motion movies with them . (That will never happen because I am so tech stupid but maybe someone else will try it ?)
Happy felting .
Needle felting, nuno and wet felting.(Click on pictures for more detail and feel free to leave comments, suggestions or questions .)
Wednesday, August 29, 2012
Sunday, August 26, 2012
Adding eyelid,lashes and whisker details to needle felt animals
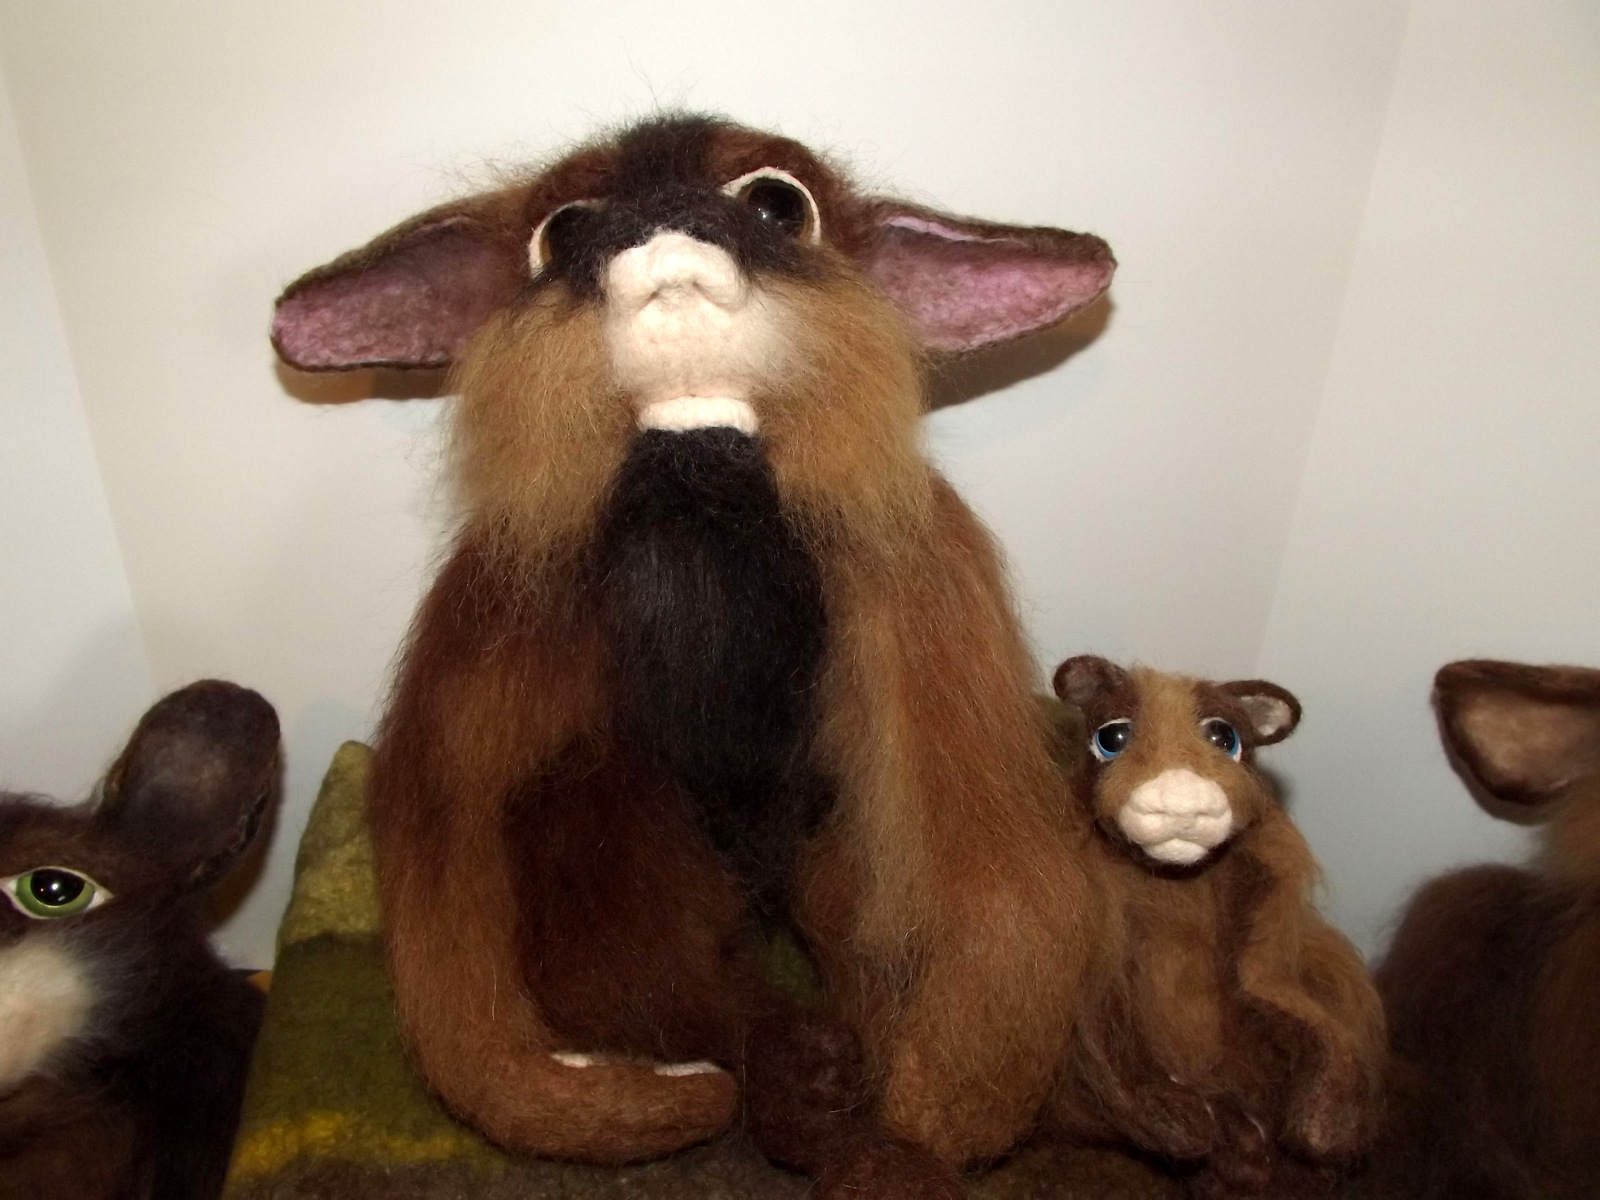
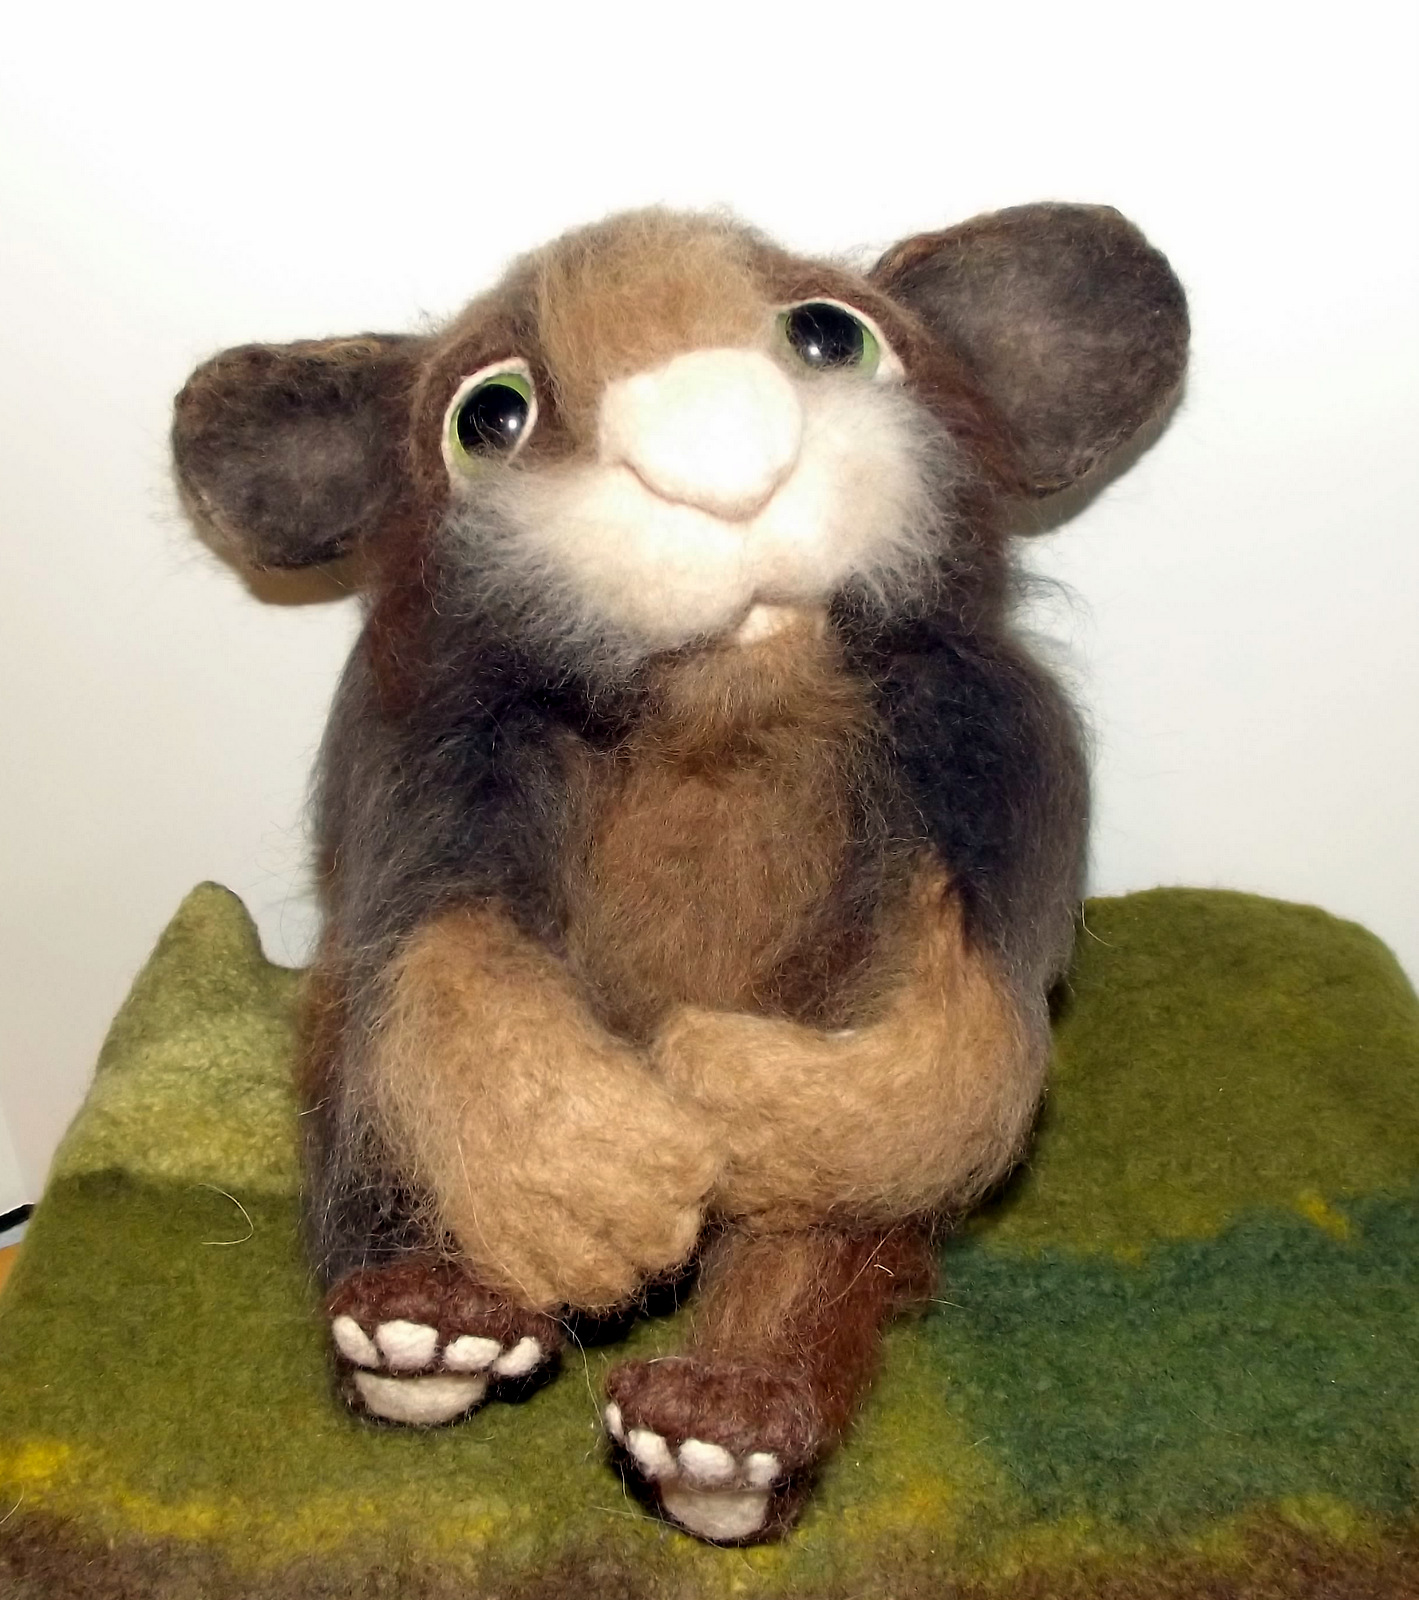
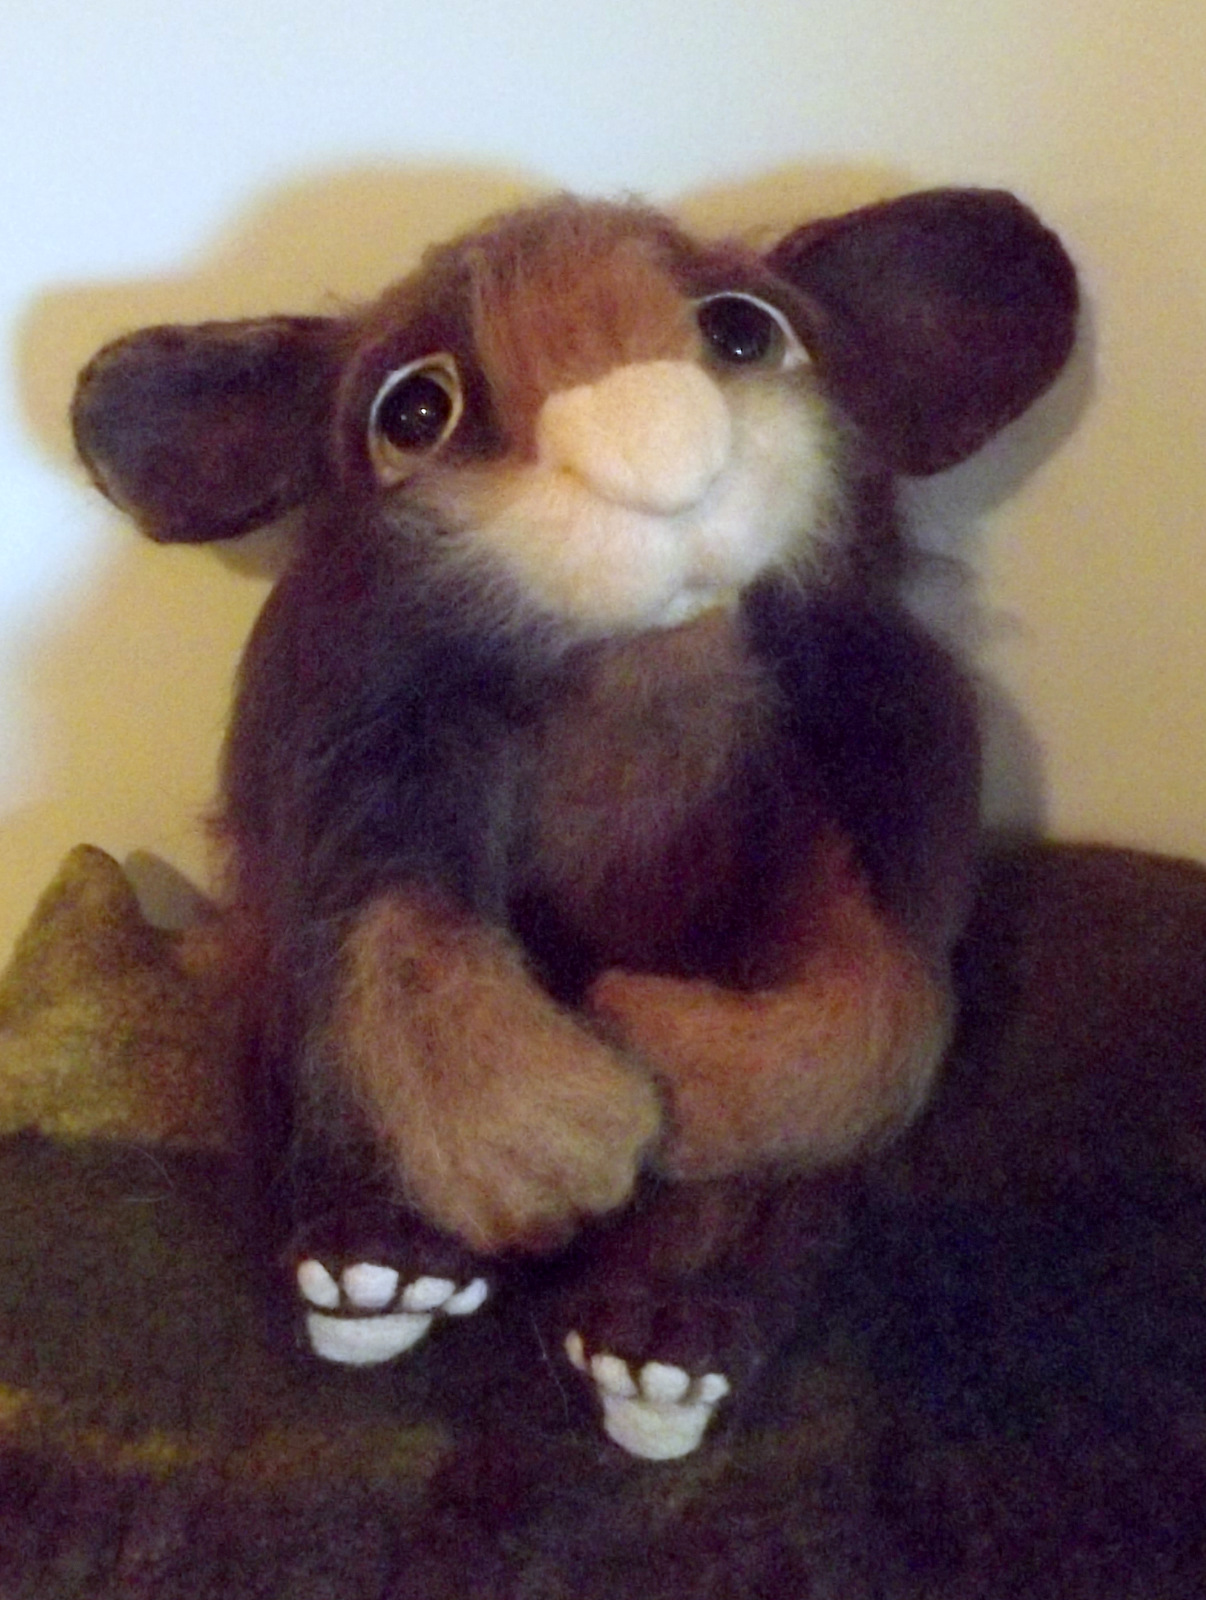
Above and below are two of my latest needle felt animals . The one on the left is my usual style and critter on right is with leather lids and lashes and a little shading on the "skin" . This is very much the experimental stage and still needs a lot of tweaking but these are some ideas that I have been wanting to try for a long time so thought I would share for you to take it in your own direction . Unfortunately, my usual low lighting is still a problem but if you click on the pictures you can see a little better detail .
Below are some of the items I collected to start this experiment . What you will need...
leather scrapes from recycled coats I bought and cut up from the thrift store .
Two sided tape from AXMAN both wide and narrow styles .
fingernail polish bought specifically to match pink skin tones
acrylic eyes
scissors or box cutter for cutting leather
brown/black mohair or alpaca for the lashes
A large or heavy book to hold leather strip
eyelash curler
hairspray or diluted clear drying glue( to shape lashes upwards)
The first step was adding the two sided tape onto side of leather you don't want showing .
Then cut along the edges of the tape for a nice straight line .
if you are using a thin leather, you can forget adding the pink nail polish to the edge and cut out larger then eye and wrap around back of eye . If you are using a thicker leather........
You can place the leather in pages of book as a clamp and with leather edge exposed add nail polish . just remember that it can drip and you don't want any of that on the front of lid so lean book in opposite direction . When it appears dry enough to not drip you can lay book down until it is completely dry <----(I learned the hard way that this is important )
Next step is the lashes and this picture shows what not to do ! I cut a strip of the thin two-sided tape and added directly to the eye above where I wanted the base of lid . I then peeled off the paper and added some of the brown mohair leaving about 1/2 of tape to fold over and hold lashes in place and that sort of worked but....as soon as I tried to trim and shape with lash curler , several of the lashes pulled out and I ended up with a bit of a mess .
Sorry no pictures of the solution but I basically took a larger then needed strip of the two-sided tape and taped the ends of it down leaving stick side up and placed a thinner layer of lashes on it . I then folded the sticky side on top of that (folding it in half ). That did work but next time I am going to try a thin layer of glue instead of folding tape over . you then cut to size and place above the line that will place the edge of the leather lid to cover the tape .
The second two experiments were......
shading using mineral make-up (instead of traditional paint in airbrush ). I did try using permanent markers for shading when I first started felting but I didn't like the crunchy rough texture that resulted . I thought some of my " never used" make up might make a more subtle result with out altering texture of the wool .
second experiment was how to add whiskers "if" I ever decide to....so far I like my animals better without them but I thought I might want to try it on some critters, some day . I bought some horse main? on Etsy and a beading needle that has a "hole" the length on the needle so is easy to thread .The needle is strnge enough to go through the wool but thin enough not to leave a big hole . Only problem I see is someone pulling on one end of the whisker could pull it all the way threw but hey.....Don't pull on the whiskers and problem solved . ( Although my goal is to make the most durable animals possible I don't think it is to much to ask that someone treat them as they would a living animal.....ie....don't throw them around the room, don't lift them by their arms or ears or pull on their tails or whiskers . )
That's it for now, more experiments to follow and hopefully, better pictures of my latest critters .
Sunday, August 5, 2012
Pictorial for adding eyes and ears to needle felt animals
When I first began learning needle felt, figuring out how to add eyes and ears to my base sculpture was one of the biggest challenges . I tried several different methods before I came up with something that worked for me . It's obviously not the only way to get the job done and I do plan on playing around with fake furs and leather lids some day .
The first step is choosing what eye to add and for my extra large critters and low budget, I chose to use a nice quality/plastic safety eyes ...(if you click on the picture you will be able to read the label on the bag of the seller I use .) A pair of eyes is around a dollar compared to the $10 glass eyes cost . Also, instead of sewing eyes on, I cut off the back nub of the safety eyes using a wire cutter and glue them down with small drops of super glue . The lid will also help them stay in place just be very careful with the glue as it will ruin any wool it drips on .
Once the yes are glued down you can start on the top and bottom lids . I'm working with mohair here so when I pull of a section, the longer fibers are more then I need just to cover the eye but once the lid part is felted around eye any extra wool can be felted directly into the check bone area to make it blend in . I don't firm up the whole section , just about twice the area of the eye,(since it will shrink up as it is completely firmed up over the eye .
I then attach the simi-firmed lid into place at the corner of the eye area and continue firming the lid "before" attaching the outer edge . The most important things to remember is to be careful not to poke the eye itself and to felt very small sections at a time . Due to shrinkage, you can't just tack the whole lid down at once but work from inner lid to outer .
You follow the above step for all four lids and blend the extra wool into the face after the lids are firmly where you want them . Because I am generally not going for a "real" animal eye look, I have the freedom to use some creativity to make the eyes "pop" . I add Vanilla merino which has a light pink tone that I like for my "flesh" color, snout, nose , ears and around eyes . I know not all animals have pink skin tones but I found the darker colors just don't have enough contrast with the brown fibers I use . I do plan on using some detail coloring to add some more natural depth to the "flesh" area but that will have to be a different tutorial . After the pink is felted into the eye lid, I use small balls of white at the eye corners to fill in the rest of the area .
I tend to use large floppy ears on most of my animals but went with a shorter ear for this guy . Again. I am using a long fiber mohair for this and just pull out one section and fold it in half . Because the fibers are all going the same direction which makes for slow felting, I add a very thin layer going side ways . Think of it as similar to creating fabric which couldn't be woven unless fiber/threads are laid across each other, not all laying parallel .Felt area and flip and repeat this at least 4 times to create a semi felted sheet . focus on edges to shape and firm the shape you want and add small bits of fiber if it's not the shape you want .
For longer floppy ears just don't fold in half and don't forget to add the cross fibers . The main rule of felting is don't forget that everything will shrink , A general rule is you will lose 1/2 to 1/3 the size you start with once the piece is felted and this is especially true for thin areas like lids and ears .
Some times I use roving for the inner ear but I recommend creating another semi felted pink piece rather then just adding pink roving directly to the semi felted brown ear . Above is a newer method felting premade semi-felt directly to the home made prefelted ear . I actually felt the pink semi-felt into the ear starting at the center of ear and felting out and then cut around the attached inner and out ear .The ears are still in a prefelt state here, so a bit strange looking but I like to add them to the head at this stage and firm and shape them more after attaching . It's easier to felt to head if you create a semi-circle by felting the bottom edges together and felt into head "trying" to attach them in symmetrical placement-------I'm embarrassed to admit that mine are never symetrical . Some glitch in my brain causes one ear to always be a little higher or further back on the head , (God made the same mistake with my own ears so I guess I shouldn't feel in to bad ). Hopefully you can get them centered where you want them : ) One thing I like about this method is that it naturally creates those little fleshy bits on the inside of the ear . Just make sure that you start attaching by felting down the bottom of the inner ear where you want the ear , folding the bumpy bits in and felting down the back of the ear . Actually was much easier to type then it is to do but just take your time and keep checking your placement .
Once the ears are attached where I sort of want them, I firm and shape them as evenly as possible . If one ear ends up larger then the other just make sure and call it "whimsical" and all is forgiven : )
You can leave it at this point but I am in love with my reverse felting needles and reverse felt the head starting at the base and working up to the top . You can also just reverse felt sections for a totally different look or trim "fur" to different lengths . I generally just trim the top of the nose and comb the rest to style it .One of the funnest thing about reverse felting is creating different layers of contrasting color and types of fiber . When the reverse needles pull out the fibers you can get some really interesting textures and color blends .
Happy felting !
Thursday, July 26, 2012
Making fuzzy Mohair critters and needle felting with reverse barbs
All my favorite fibers in one giant needle felt critter . Ears are white bamboo and pink merino . The core is a blend of med fine wool with a nice thick layer of alpaca and mohair .
This was the first time I have tried the reverse felting with mohair and I have to say that it looks pretty bad after you first felt the mohair down . However, as soon as your reverse felt the area it becomes a nice shaggy coat of shiny bliss . You do lose some of the fiber as it is being pulled back out but if you lay down a nice layer it doesn't matter . All the animals have been brushed and any lose fiber removed but they are still nice and bushy .
I do trim the alpaca face on the top of the nose but left the rest because I like the shaggy look .
This shows the length if the white mohair fiber which works great for my large animals but would probably have to be trimmed for smaller animals .
This is an attempt to take a picture in my living room during the after noon and with the sliding door shades open....(still looks like a cave) . The metal ruler shows the height of animals, each about 12 inches of leg and 10-12 inches of body and head .
This is my second mohair animal in a rather unusual posture ., A bit like a runners stretch .
MY BF found it to be confusing to the eye , as if one leg was shorter then the other rather then just tucked up and bent . AH well, can't please everyone .
Look who appeared in the middle of the photo shoot . Max is really jealous of all the hours I spend making my animals .
Above and below are the medium size critters I made this month....I really can't understand why I seem to be felting so slowly lately . Only 4 animals this past month ? Am I being abducted by aliens because I seem to be losing hours .
Having fallen in love with the mohair, I ordered some on-line this past week and .....am now very confused . Below is a picture of two different sellers fiber....both are marked 4oz 100% mohair .and could not look or feel more different .
The one on the left is a beautiful blend of fall tones and is really soft but unlike alpaca, also has a nice shine . The one on the right looks like human hair, ( and all the mohair I have bought in the past ). It is very long, thick, shiny and makes a beautiful coat of fur on my animals but I couldn't believe that it was actually 4 OZ as it is so much denser and heavier by size then most animal fibers . Perhaps the left mohair is just smaller broken bits and that makes it seem fluffier ? Anyone care to way in I would love your opinions . Without a DNA test I could not swear that the one on the left is not pure mohair and without a scale could not attest that the one on the right is not 4oz but....I do wonder .
Last and least, (to everyone but me), I fixed my multi-needle tool dilemma .
Above is my solution to a more comfortable felting tool . The part on the left is the aluminum base(covered in leather) that holds 4-6 needles . The middle bit is something I picked up at AXman just a bit of plastic with a hole in it to hold the needles in place and the top on right is the old bottom for my red handled felt tool that wore out . This fits much more comfortably in my hand then the original metal top .
Below is the little Tupperware of my needle essentials.....multi tool "re-vamped" and tube with extra needles in different sizes to fit in tool . I also have several individual needles that I wrap in old pieces of leather that I have put two sided tape on . I get the tape at Axman and I think it is used for sticking carpets to floor and not the thinner tape used in sealing windows . Anyway, it works great and I always carry extra strips incase I need to wrap a needle and it also works to protect your fingers . I also carry a fingernail file because my fingers get rough from all the needle pokes and it drives me nuts to work with fiber and rough fingers .
That's it for the month . Another one that just seemed to fly by getting little done .
Monday, July 2, 2012
Is Taxidermy still creepy if no animals were killed making it ?
Firstly, this is almost exactly one month of needle felting done while working a full time job,(which allows me about 4 hours of felting each night and another 6 hours before and after work),as well as Physical Therapy 3X a week . The injury has also slowed me down but I'm not sure if that is a temporary or permanent situation . What I have been wondering is if there will ever come a time when I could sell my art for a price that would allow me to live on what I make . At this rate, I doubt it, but perhaps as more people become aware of needle felting as a form of sculpture it will gain value ? Even without the extra time of not having a "real job" , I would have to allow for all the hours of marketing, going to art/craft fairs and doing all the other mundane self promotion needed to sell . It's daunting, as like many people, I would love to support myself doing something I love and creating these fuzzy friends is a true passion for me .
When I began felting it was with a single , size 40 needle . Needless to say, that would not be effective for making the large animals I am making now . The past year or so I started using a 4 needle tool (with the red handle) and it has been great . Problem is that over time the wood eventually became a bit warped from the constant friction and the needles were no long completely vertical which makes them vulnerable to bending and breaking , So, I recently bought the metal felting tool on the right that I then covered in leather . It is very sturdy which is great but it does not feel as comfortable in my hand as the other one . The ideal solution would be something with the wooden top and the metal bottom . I think that is a pretty easy fix so will work on that soon .
Sorry for the redundant picture but I wanted to see what they looked like with different lighting as lighting has still been my nemesis when taking pictures . Even with clear skies, we get so little light in this apartment that it often feels like a cave. I love caves but not the best place to take pictures and using a flash makes the images so grainy . I have a private fantasy that some local photographer will see my animals and want to exchange their photo skills for a chance to sell my animal images ....unlikely, I'm afraid I will have to save up money to pay someone to take some nice nature shots of my animals . Maybe this fall when the leaves are changing color as I think they would look great with the mostly brown critters .
So, above gets back to actual topic of this blog . What are your opinions of Taxidermy ? I love animals but I do have a secret love of taxidermy, (as well as a love of bones and fur) . I don't want any animals to be killed but if they are dead....well, it should still be gruesome to have a dead thing in my living room....and yet . I still find it beautiful because the animals are beautiful . I guess it is just one of those unpleasant realities of being a human who holds contrary values and esthetics in the same brain . The mounted needle felted heads are a compromise of sorts . They are fuzzy and I think cute but with that touch of the forbidden . I haven't yet attached anything on the back to mount them on the wall but I think they also look interesting snout up on a table . The two above are both reverse felted and have baby alpaca locks needle felted into them <----incredibly time consuming but the best way to create the natural fur look without killing any animals .
So that is it for the month . The summer appears to be either filled with rain or baking hot, which does not go well with my bodies own hot flashes . So I sit in my cozy cave with British TV shows on Netflix creating my own little world of fuzzy critters . Things could be much worse . Hope you have found your own small comforts this summer .
Subscribe to:
Posts (Atom)